A very good morning (or afternoon) to all the Aussies who have just entered the article. Hope you’re having the best day, and I hope it started off with some tasty Vegemite toast. I’m here today to tell you how you can make the perfect Vegemite toast, with some pretty fine detail, because we all deserve to be eating perfection.
This recipe is going to completely change your perception on this classic Aussie meal. Sure you may have your own tips and tricks to making good Vegemite toast, but I’m here to show you how to make heavenly Vegemite. Godly Vegemite. You’re about to impress your family and friends with this stuff.
My credentials? Well, I once ate Vegemite toast for brekky four months in a row, so I guess I’ve had a little practice in perfecting the steps.
Also, a quick disclaimer, I fully understand that this article is a pretty dumb yarn about a three-ingredient meal, but for too long have people been making botched Vegemite toast. The bread is too soft, the Vegemite is too much and the butter is all wrong. I’m here to help you make godly Vegemite toast with some exact steps.
Alright, let’s get into it!
Step 1: Get ya bread
Alright so I’m a multigrain bread nut, and I think it really adds something to a Vegemite toast that is just *chef’s kiss*. I understand that most people use white bread, but I’m telling you, you need to stop.
White bread is the grass of the flower world, there are just so many better options out there. Switch to multigrain, pop it in the freezer, and let it last forever. Vegemite toast on tap whenever you want, no mouldy bread.
Trust me, freezing your bread changes nothing except for the setting you need to put the toaster on when you put the bread in. Get on board and ditch your cupboard-stored white bread days. Elevate.
So yeah, get two slices of standard square-shaped multigrain bread (it’s better for you), and let’s get this toast a-cookin’.

Step 2: We toastin’ baby
Look I’m not going to pretend like you didn’t know what came next, but alas, let’s go over this, because it’s a step that a lot of people fuck up on. Also, I’m just very excited to talk about this, so let’s do it.
Alright so, frozen bread goes in with the little notch just above the two. That’s how I have created flawless toasts every time without fail. We absolutely, do not under any circumstances, want burnt toast. If that’s your thing, I get it, but we’re doing it my way here, so strap in.
When the notch is just above two, frozen bread will come out that perfect level of toasted. I’m talking not burnt and not soft. Toasted bread that has crunch, and looks golden brown. I’m truly salivating at the mere thought.
So yeah, when they pop up, you’ll want to see a light brown toasted effect over all your bread. Putting that baby back down is always fine if your toaster spits out something soft and undesirable, but my instructions should always produce perfect results.

Step 3: Get fuckin’ ready
I cannot stress enough how crucial this part is. You need to have your spreads open and ready because this is going to make or break your toast experience right here.
For butter, I usually use Western Star (which expensive but tasty AF and so, so worth it), and for Vegemite, I use, well, Vegemite. Also, it’s important to have a plate ready as well.
Okay so, as soon as that toast pops up, I want you to grab a single toast, put it on your plate, and put the other one back down into the toaster to stay warm (don’t worry it won’t burn). Quickly spread your butter on the toast you took out, and watch that stuff just MELT, and then pop up the next one and do the same.
If you delay by even a couple of seconds, the butter will not melt to perfection, which is why we do one at a time, because if you take both out together, your first toast will have buttery melted goodness and your second one will just look sad.
At the end of this step, you should have two well-toasted pieces of bread with melted butter all over them.

Step 4: Vegemite time
Okay, time for the star of the show.
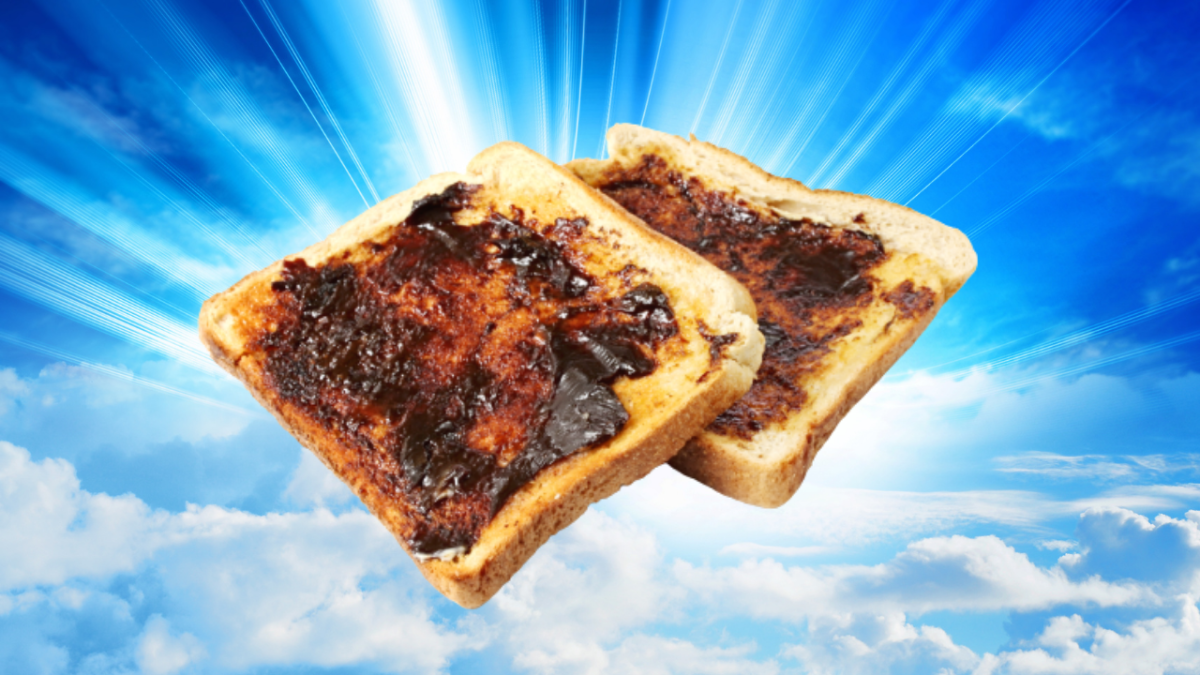
For Vegemite, I cover just the tip of the knife in a good amount of the stuff, and then dab it all across one of the toasts, then repeat. You should be dancing across that toast like the artist you are, covering a good amount of it in patches of the stuff.
The spread should be mixing up with that melted butter for what looks like pure sex on a plate.
Don’t go spreading the Vegemite like you would your butter, because that’s pretty criminal. Also, here is why we didn’t go for a blackened toast. When you burn the toast, although it adds a bit of flavour to the final product, you can never really see where the fuck your Vegemite is in the final product.
Also, we went for a well-toasted bread because if it’s still more white than brown, you may have difficulty applying the butter, and it just won’t taste that good.

Step 5: Enjoy mate!
Look at your creation! Aren’t they simply delicious? Time to sit down with your coffee/tea and enjoy your brekky!