Like whistling, clicking your fingers or deep-throating phallic objects, being able to do the splits is often considered a talent you’re either born with, or will never achieve.
If, like me, you were born with legs that just won’t quit split, you’ll be happy to know that learning the manoeuvre is actually entirely achievable.


tfw u try in jeans and crush your precious ding donger
Yes. You don’t have to be a sugar-hyped twelvie at a Frozen-themed sleepover to enjoy the benefits of splitting.
If you’re chained to a desk 9 – 5, chances are your hip flexors are tight as a salsa jar’s lid. This can lead to lower back pain, weak butt cheeks and poor posture.
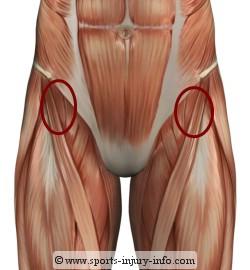
these fleshy circles are hip flexors
Teaching your rig to split is an A+ way to reverse the aforementioned issues. Before you start splaying your extremities across the floor, you need to make sure your core strength is in order.
If you already workout regularly, half the battle is won. Now all you gotta do is up your stretching game and you’re on a one-way express to Splitsville. That said, it’s important that warm up before doing stretches – light cardio or a full-blown workout, whatever your choice – cause if you don’t, you up your risk of straining and injury. No fun.
And a last word of advice – this ain’t gonna come easy. You’ll probably need around 12 weeks of diligent training to get your body into groove.
STRETCHES TO MASTER ON ROUTE TO SPLITS
Hip Flexor Stretch
Pretend for a moment you are not forever alone, and that you have a sweet honey you adore. Now imagine bending down on one knee, with a sparkling ring worth more than your life, and popping the big question.
That, in essence, is the hip flexor stretch.
Get on your knees and bring from right left forward so it’s bent at a 90 degree angle in front of you, then thrust your left hip forward. You should feel a tugging in that left hip, precisely in the round circle in the above picture. Do the stretch for 30 seconds each side, three times.
(Make sure your knee doesn’t track over your big toe – bad for those dicky knees.)
Hamstring Stretch
Laying down on your back (on a mat), raise your right knee up towards your face. Grab the back of your thigh, just above the knee, and pull until you feel tension. You should feel this tension through the back of your thigh. Hold it static for 30 – 45 seconds, then switch legs. Repeat this 3 times.
Once you feel comfortable with this move, you can graduate to extending your leg. Alternatively, you can grab a rubber band / strap, loop it around your sole of your foot, and pull it taut, like so.
GETTING DOWN INTO IT
Once you’ve smashed those prerequisite stretches, you can move onto the block-and-split-focused situation.
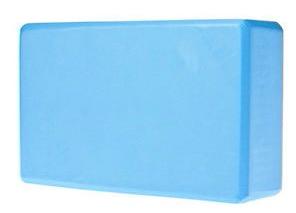
Instead of roaring right into giving the splits a go, use a yoga brick or two.
like so
Start in the lunge position, and slowly creep your front foot forward while both hands are supported by blocks. Once you’re in a position that feels tuggy but not painful, stay there for 15 seconds.
Make sure your hips are square (that is, one hip shouldn’t be in front of the other) and focus on your breathing.
THE GOLDEN MOMENT
After weeks of stretching, you should be seeing progress. Until eventually…
GET YOUR FOAM ROLL ON, TOO
This is an important step, though often overlooked.
Those people at the gym rolling around on the floor on small tennis balls / foam rolling thingumabobs are busy doing self-myofascial release. This activity helps to untie knots in your muscles, relieve tightness and assist in muscle recovery. It should be the third element to your split-training schedule (exercise > stretches > foam rolling). You can read our guide on how to get started HERE.
You, nek minut:
Photo: Volvo.